회사에서 내가 NestJS 서버 개발을 맡기 시작한 지 약 한 달이 흘렀다.
물론 NestJS 서버 개발 업무만 진행한 것은 아니지만, 이번 달에는 기본적인 서버 구조를 잡고 빠른 배포까지 진행하게 되었다.
개발 문화도 나름 잘 구축해가고 있다. (커밋 컨벤션, 이슈, 프로젝트 이용)
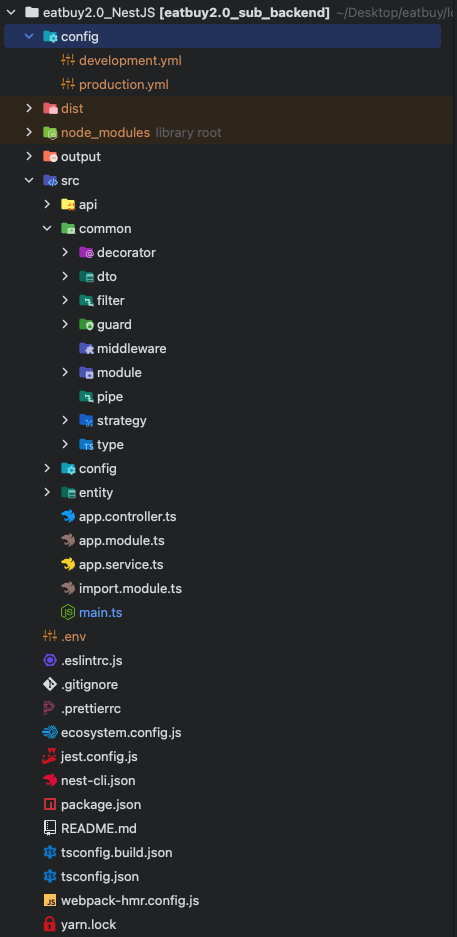
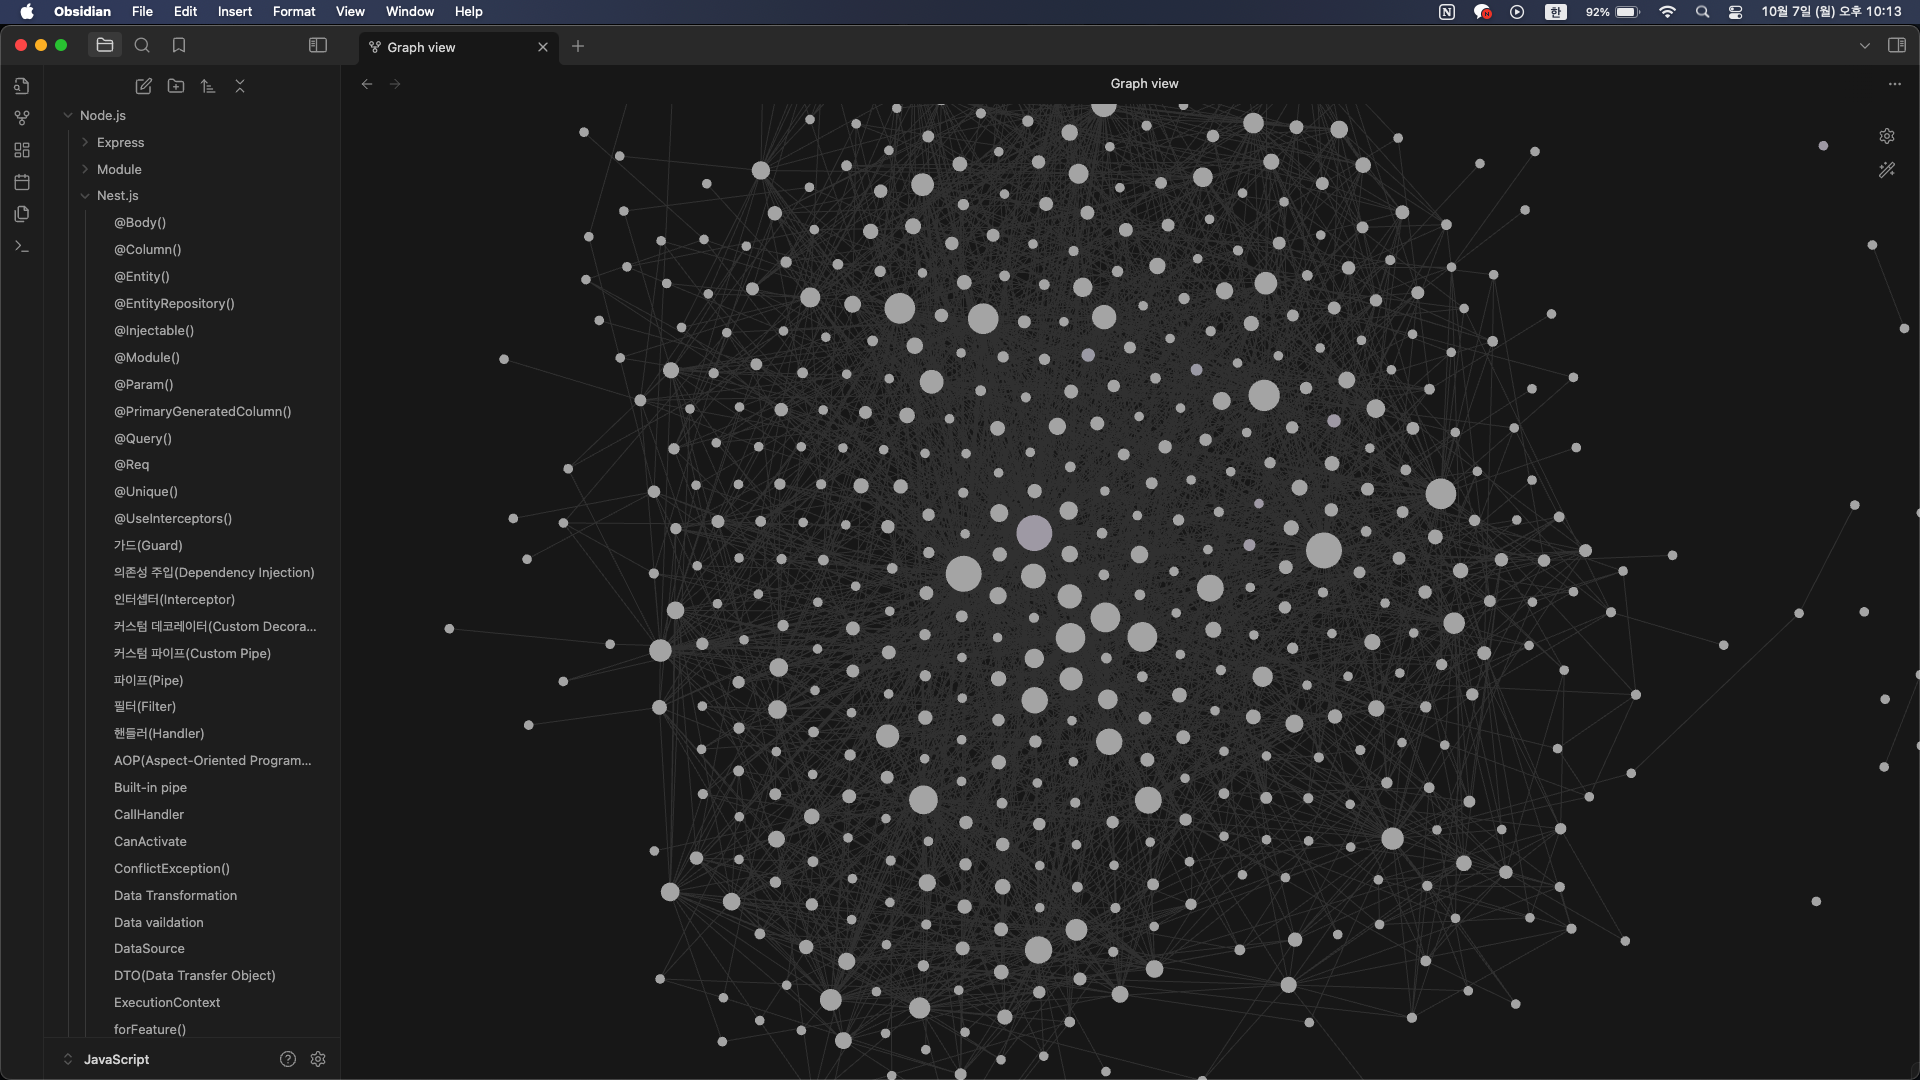
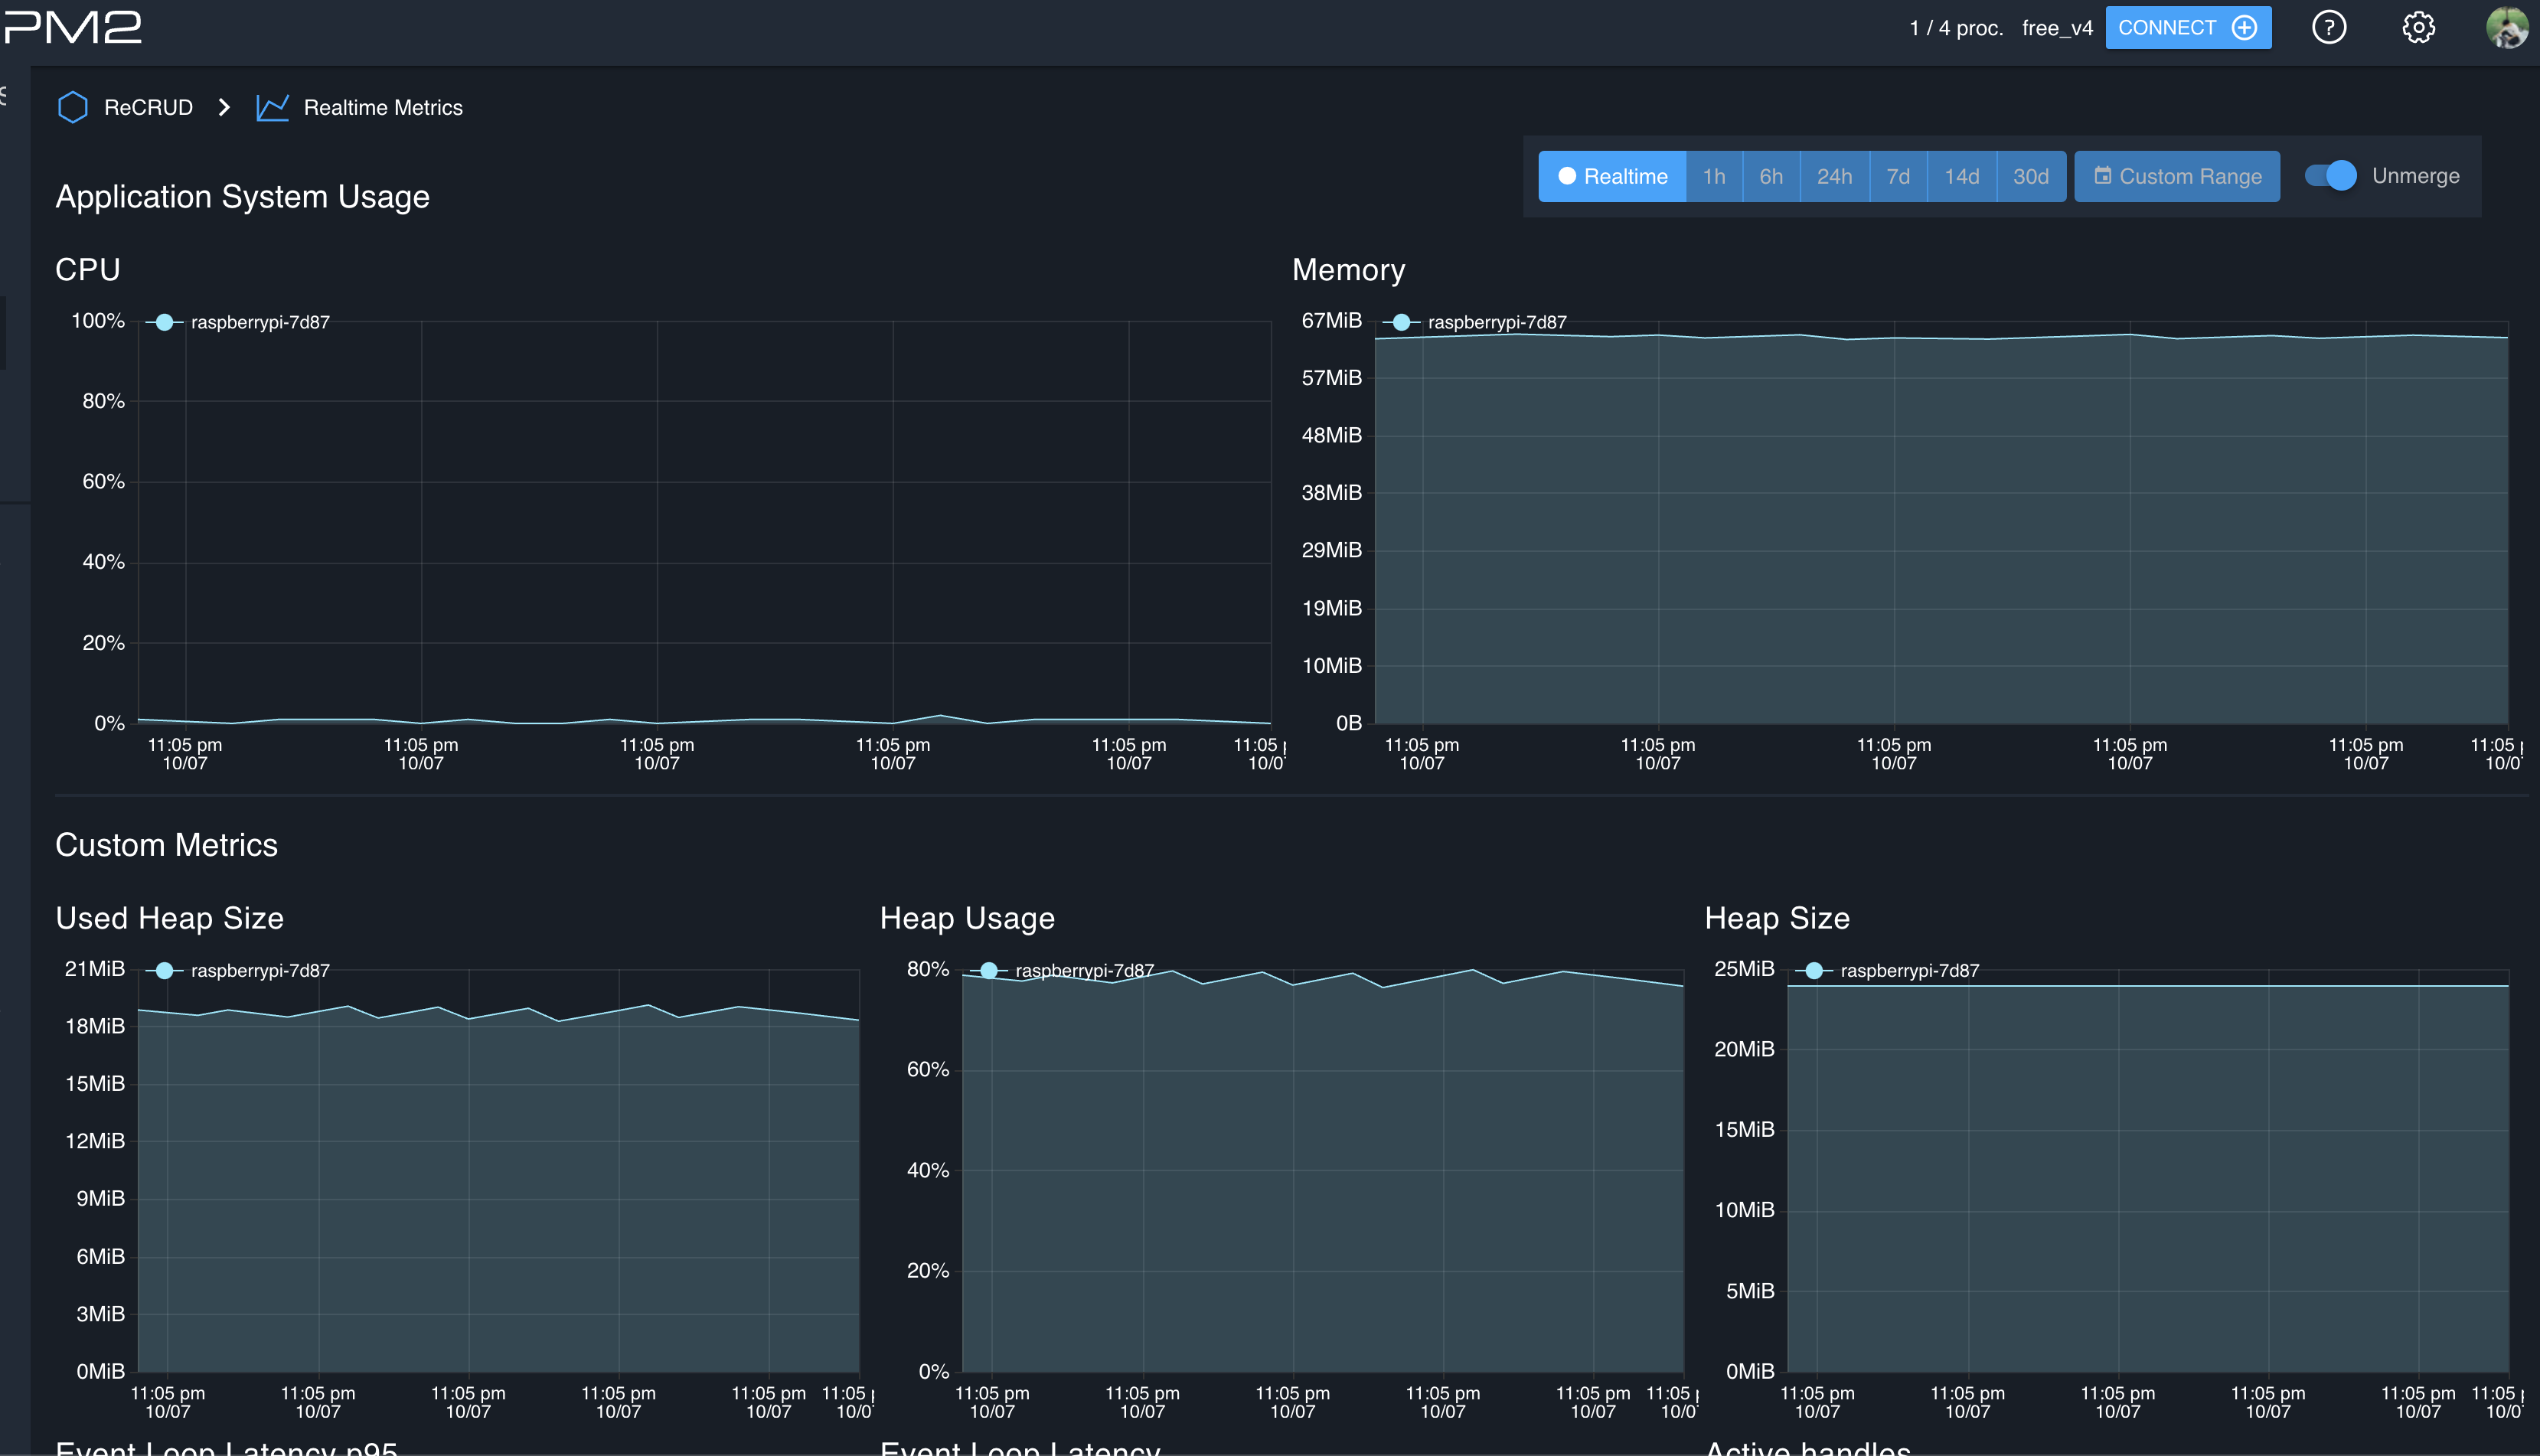
여튼 이번 달에 내 기억에 남는 기술들은 아래와 같았고, 제외하고도 추가적으로 몇 가지를 더 사용했다. 몇 가지 자잘한 것들이 더 있지만 일단은 백로그처럼 적어두고 하나씩 더 구체화하면서 하나씩 개모임 때 이야기를 해보겠다.

NestJS는 애플리케이션이 부트스트랩되어 종료될 때까지 다양한 수명 주기(Lifecycle) 이벤트를 관리한다고 한다.
이를 통해 초기화, 실행, 종료 과정에서 적절한 로직 수행이 가능하다.
useEffect가 떠오른다.
NestJS의 수명 주기는 다음과 같이 3가지 단계로 나눌 수 있다
onModuleInit() | 모듈 종속성이 해결된 후 호출 |
| onApplicationBootstrap() | 모든 모듈 초기화 후 연결 수신 대기 전에 호출 |
| onModuleDestroy() | 종료 신호 수신 후 모듈 종료 시 호출 |
| beforeApplicationShutdown() | 모든 onModuleDestroy()가 완료된 후 호출 (Promise 처리) |
| onApplicationShutdown() | 애플리케이션 종료 후 호출 |종료 훅은 enableShutdownHooks()를 호출해야만 활성화된다. 이 메서드는 애플리케이션이 종료될 때, 시스템 신호를 수신하고 종료 프로세스를 진행할 수 있게 도와준다.
TypeScriptimport { NestFactory } from '@nestjs/core'; import { AppModule } from './app.module'; async function bootstrap() { const app = await NestFactory.create(AppModule); app.enableShutdownHooks(); // 종료 훅 활성화 await app.listen(대충 포트번호); } bootstrap();
종료 신호가 수신되면 아래와 같이 onApplicationShutdown() 메서드를 통해 시스템 신호를 받아 애플리케이션이 적절히 종료된다.
TypeScript@Injectable() class UsersService implements OnApplicationShutdown { onApplicationShutdown(signal: string) { console.log(signal); // e.g. "SIGINT" } }
그렇다고 한다…
아래 이미지는 NestJS 공식 사이트 이미지
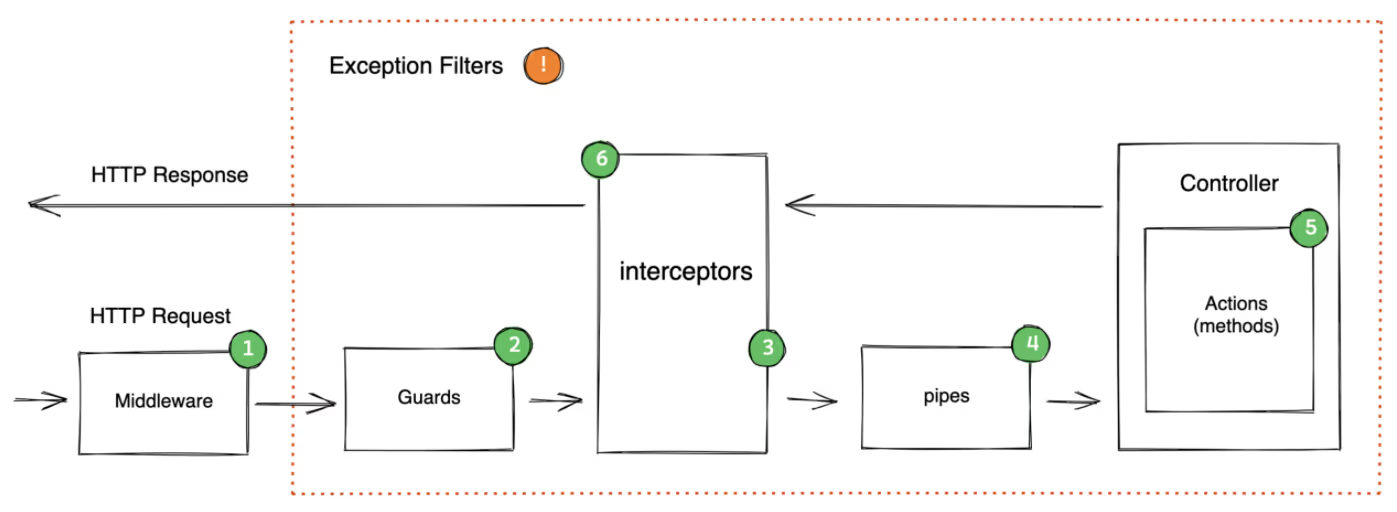
NestJS는 미들웨어, 가드, 파이프, 인터셉터 등 다양한 단계로 요청을 처리한다.
NestJS는 각 단계에서 인터셉터(Interceptor), 가드(Guard), 필터(Filter), 파이프(Pipe) 등의 역할을 지정해둔다.
인터셉터는 함수 실행 전후에 로직을 추가하거나 응답 데이터를 가공하는 데 쓰인다.
이것도 약간 JSX에 비유하자면, useEffect 처럼 응답 보내기 전이나 후에 "잠깐만, 나 할 거 있어" 하면서 로직을 끼워넣는 것과 같았다.
TypeScriptimport { Injectable, CallHandler, ExecutionContext, NestInterceptor } from '@nestjs/common'; import { Observable } from 'rxjs'; import { tap } from 'rxjs/operators'; @Injectable() export class LoggingInterceptor implements NestInterceptor { intercept(context: ExecutionContext, next: CallHandler): Observable<any> { console.log('Before...'); // 메서드 안에 들어있으면 이전 const now = Date.now(); return next.handle().pipe(tap(() => console.log(`After... ${Date.now() - now}ms`))); // return 부에 넣으면 이후 } }
가드는 요청이 실제로 처리되기 전에 인증, 권한 검사를 수행하는 데 사용된다.
TypeScriptimport { Injectable, CanActivate, ExecutionContext } from '@nestjs/common'; @Injectable() export class AuthGuard implements CanActivate { canActivate(context: ExecutionContext): boolean { const request = context.switchToHttp().getRequest(); // 국룰 req 코드 return request.headers.authorization === 'my-secret-key'; } }
사용은 아래와 같은 컨트롤러에서 @UseGuards 데코레이터를 사용해서 쉽게 사용한다.
TypeScript@Post() @UseGuards(AdminAuthGuard) async createProduct(@Body() productData: Partial<Product>, @AuthAdminUser() adminUser): Promise<ProductDetailDto> {}
필터는 예외 상황에서 사용자에게 적절한 메시지를 반환할 수 있다.
TypeScriptimport { ArgumentsHost, Catch, ExceptionFilter, HttpException } from '@nestjs/common'; import { Response } from 'express'; @Catch(HttpException) export class HttpExceptionFilter implements ExceptionFilter { catch(exception: HttpException, host: ArgumentsHost) { const ctx = host.switchToHttp(); const response = ctx.getResponse<Response>(); const status = exception.getStatus(); const err = exception.getResponse() as { message: any; statusCode: number } | { error: string; statusCode: 400; message: string[] }; // class-validator의 타입핑 response.status(status).json({ success: false, code: status, data: err.message, }); } }
위의 코드는 실제로 내가 사용할 때 class-validator에서 뱉는 오류 대신 특정 문자열을 반환시킬려고 적용한 커스텀 필터이다.
아래처럼 main.ts에 적용시켜서 사용가능하다.
TypeScriptapp.useGlobalFilters(new HttpExceptionFilter()); // 커스텀 오류 메세지를 이용하기 위함
파이프는 요청된 데이터를 변환하고 유효성을 검증하는 데 사용된다. 주로 데이터 변환(Data Transformation)이나 유효성 검사(Data Validation)를 처리한다.
파이프는 요청이 컨트롤러에 도달하기 전에 데이터를 변환하고 검증하는 역할을 하며, Handler-level, Parameter-level, Global-level로 나누어 사용할 수 있다
TypeScript@Post() @UsePipes(ValidationPipe) createBoard(@Body() createBoardDto: CreateBoardDto) { return this.boardsService.createBoard(createBoardDto); }
ValidationPipe는 컨트롤러 메서드가 호출되기 전에 요청 데이터를 검증한다.TypeScriptasync function bootstrap() { const app = await NestFactory.create(AppModule); app.useGlobalPipes(new ValidationPipe()); // 전역 파이프 설정 await app.listen(3000); } bootstrap();
약간 스프링의 롬복을 떠올리게 만들었다.
TypeScriptimport { IsNotEmpty } from 'class-validator'; export class CreateBoardDto { @IsNotEmpty() title: string; @IsNotEmpty() description: string; }
CreateBoardDto에서 title과 description 필드가 비어 있지 않은지 검증하며, class-validator는 이런 식으로 모델의 유효성을 보장한다.공부를 하다가 핫 리로딩을 발견하였고 이를 적용시키면서 DX를 크게 향상시켰다.
즉, 상태 유지가 되기때문에 서버 재시작 없이 코드 변경이 적용되므로, 세션이나 데이터를 다시 불러오는 등의 번거로운 작업을 줄일 수 있었다.
핫 리로딩을 설정하기 위해 webpack-hmr.config.js 파일을 만들었다. 이 파일은 Webpack을 사용하여 모듈이 변경될 때마다 즉시 반영되도록 하는 설정을 포함한다.
JavaScriptconst nodeExternals = require('webpack-node-externals'); const { RunScriptWebpackPlugin } = require('run-script-webpack-plugin'); module.exports = function (options, webpack) { return { ...options, entry: ['webpack/hot/poll?100', options.entry], externals: [ nodeExternals({ allowlist: ['webpack/hot/poll?100'], }), ], plugins: [ ...options.plugins, new webpack.HotModuleReplacementPlugin(), new RunScriptWebpackPlugin({ name: options.output.filename }), ], }; };
JSON"start:dev": "nest start --watch" // 원래 "start:dev": "nest build --webpack --webpackPath webpack-hmr.config.js --watch" // 변경
Strapi로 설계된 기존 데이터베이스에서 ORM을 위한 엔티티(Entity)를 쉽게 생성하기 위해 사용한 툴이다.
Strapi가 설계한 복잡하고 정리되지 않은 수많은 필드들을 직접 관리하지 않고도, 자동으로 엔티티를 생성할 수 있어 매우 유용했다.
Bashtypeorm-model-generator -h [dbhost주소] -d [데이터베이스이름] -p 3306 -u [유저] -x [비밀번호] -e [db종류] -o ./mymodel
output/entities 폴더에 저장되었으며, 이를 통해 데이터베이스를 직접 확인하지 않아도 모델을 쉽게 관리할 수 있게 되었다.나의 경우는 output/entities에서 복사하여 필요없는 필드는 걷어내고 src/entity로 옮겨 사용했다.
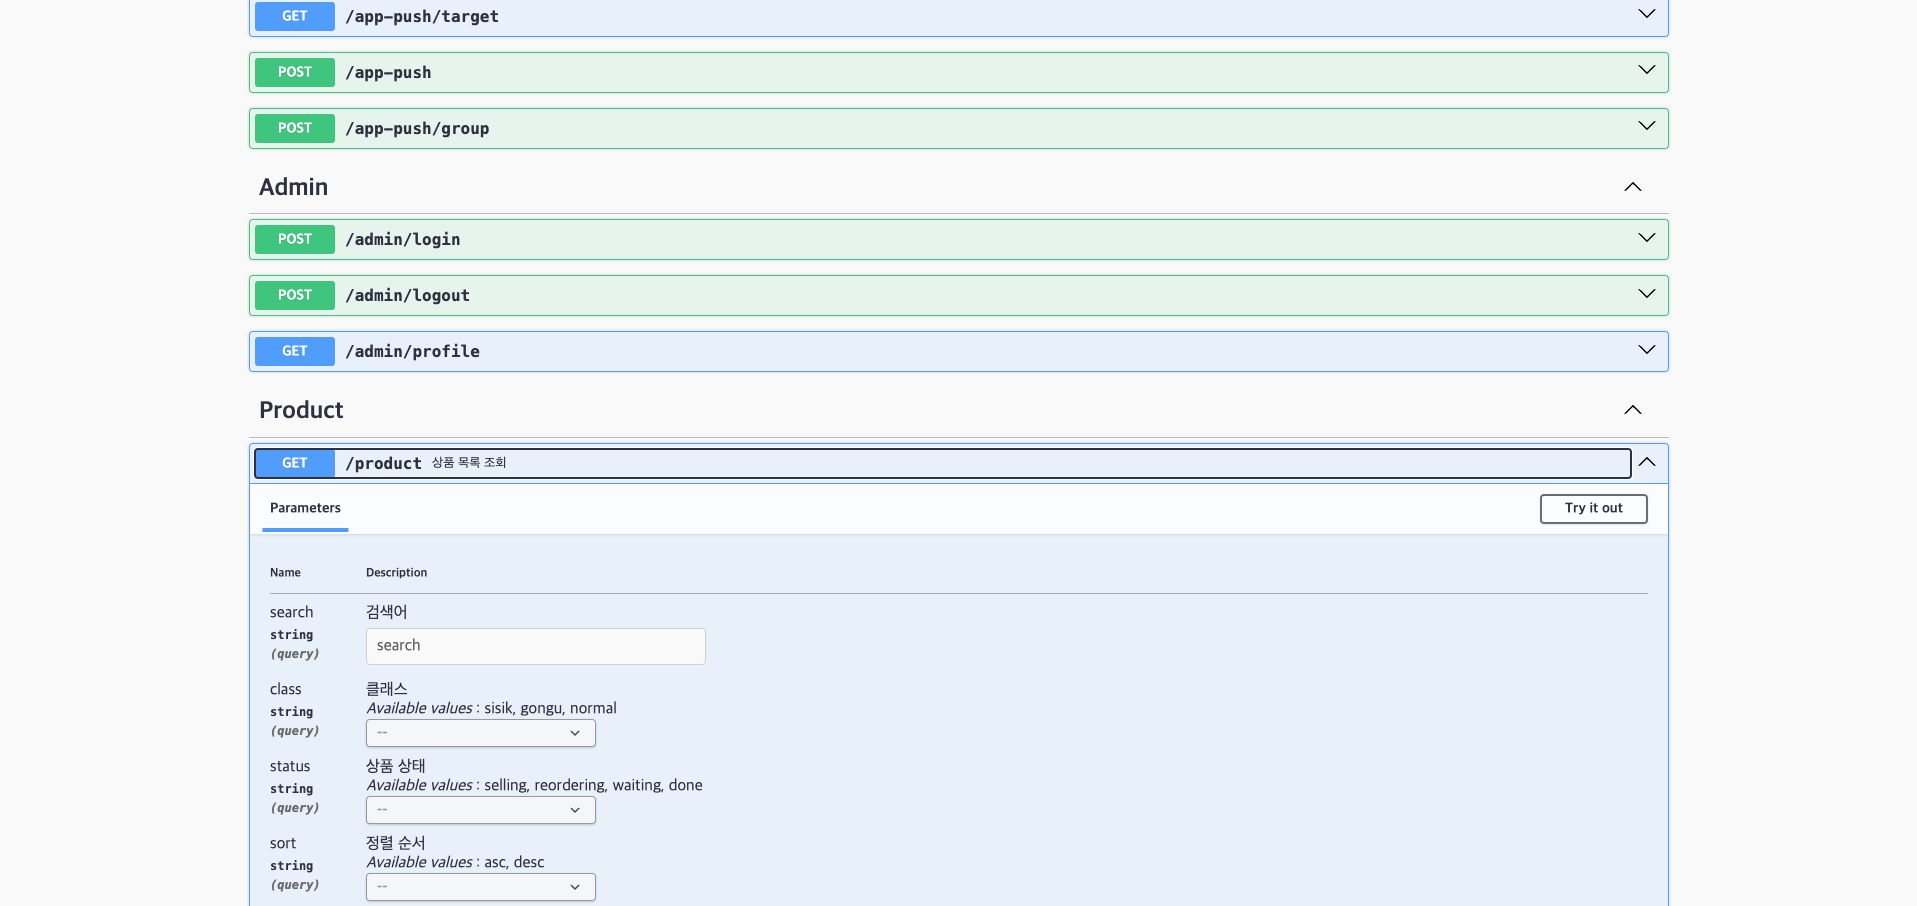
main.ts에서 Swagger 설정을 아래와 같이 추가할 수 있다. (데코레이터 붙이면 잘 만들어 준다.)
TypeScriptimport { SwaggerModule, DocumentBuilder } from '@nestjs/swagger'; import { NestFactory } from '@nestjs/core'; import { AppModule } from './app.module'; async function bootstrap() { const app = await NestFactory.create(AppModule); // Swagger 설정 const config = new DocumentBuilder() .setTitle('API 문서') .setDescription('API에 대한 설명') .setVersion('1.0') .build(); const document = SwaggerModule.createDocument(app, config); SwaggerModule.setup('api-docs', app, document); await app.listen(3000); } bootstrap();
위 설정을 통해 Swagger 문서를 http://대충 배포 url/api-docs에서 확인할 수 있다.
TypeScriptimport { Controller, Get, Post, Body } from '@nestjs/common'; import { ApiTags, ApiOperation, ApiResponse, ApiBody } from '@nestjs/swagger'; import { CreateBoardDto } from './create-board.dto'; @ApiTags('Boards') // Swagger에서 해당 컨트롤러의 카테고리 태그로 표시 @Controller('boards') export class BoardsController { @ApiOperation({ summary: '게시글 목록 조회' }) // 각 엔드포인트 설명 @ApiResponse({ status: 200, description: '성공적으로 게시글 목록을 가져옴' }) @Get() getAllBoards() { return '모든 게시글을 반환'; } @ApiOperation({ summary: '게시글 생성' }) @ApiBody({ type: CreateBoardDto }) // 요청 body에 대한 설명 @ApiResponse({ status: 201, description: '게시글 생성 성공' }) @Post() createBoard(@Body() createBoardDto: CreateBoardDto) { return `게시글 ${createBoardDto.title} 생성 완료`; } }
어드민 인증, 유저 인증, 상품 api 개발, gnb api 개발 등을 만들었고 유지보수하지만 기억에 남는 작업은 fcm 자동화가 아닐까 싶다.
Firebase Cloud Messaging을 사용해 푸시 알림을 자동화한 것도 기억에 남는다. 푸시 알림을 보내는 백엔드를 처음으로 만들어보기도 했고, 내용 입력하고 버튼 딸깍으로 자동화해서 유저들에게 푸쉬알림을 보낼 수 있게 만들었다는 것이 재밌었다.
아래와 같이, db에서 유저 필터링해서
TypeScriptconst users = await this.upUsersRepository .createQueryBuilder('up_users') .where('up_users.device_token IS NOT NULL') .andWhere('up_users.is_ad_push = :isAdPush', { isAdPush: true }) .andWhere('up_users.push_agree IS NOT NULL') .andWhere('LENGTH(CAST(up_users.phone AS TEXT)) < 11') // phone을 문자열로 변환 후 길이 확인 .select(['up_users.id', 'up_users.username', 'up_users.deviceToken', 'up_users.isPush', 'up_users.isAdPush', 'up_users.phone']) .getMany();
TypeScript// Google Access Token 생성 async getAccessToken(): Promise<string> { const client = new JWT({ email: firebaseConfig.client_email, // 깨알 보안 key: firebaseConfig.private_key, scopes: ['https://www.googleapis.com/auth/firebase.messaging'], }); const accessTokenResponse = await client.authorize(); return accessTokenResponse.access_token; } // FCM HTTP v1 API를 사용해 푸시 알림을 전송하는 메서드 async sendPushNotification(token: string, title: string, body: string, link?: string): Promise<any> { const accessToken = await this.getAccessToken(); const message = { message: { token: token, notification: { title: title, body: body, }, data: { link: link || 'https://eatbuy.co.kr', }, }, }; try { const response = await fetch(this.fcmUrl, { method: 'POST', headers: { Authorization: `Bearer ${accessToken}`, 'Content-Type': 'application/json', }, body: JSON.stringify(message), }); if (!response.ok) { const errorMessage = await response.text(); throw new Error(`Failed to send push notification: ${errorMessage}`); } return await response.json(); } catch (error) { throw error; } }
푸시알림 로그는 strapi 테이블에 연동해놔서 strapi에서 확인이 가능하다.
만료된 토큰은 삭제하는 건 혹시 몰라 아직 검토중이다.